1-DIMENSIONS ….. 2-SUPPLIES ….. 3-BUILD
STEP 3: MAKE THE BOARDS
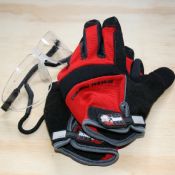 We’re gonna jump into the fun stuff at this point! Before we do anything, this would be a good place for a reminder about safety. Safety glasses should be worn any time you’re working with a power tool. You might as well leave them on when you’re working with ANY tool. Also, find a good pair of gloves. Make sure you know how to use any tool you pick up. We’re not going to discuss much on the proper use of tools so if you’re unsure, find somebody that knows how things work.
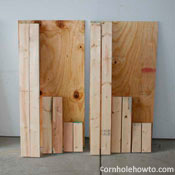
The first step to building your cornhole table is to cut your wood. The 2x4s will be cut for our frames and legs. For one set (2 cornhole tables) you’ll need boards with the following lengths:
- 4 feet (4) (frame sides)
- 21 inches (4) (frame ends)
- 16 inches (4) (legs)
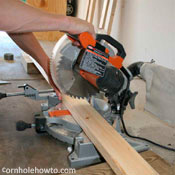 Cut the 2x4s with a mitre saw if available or a hand saw (use a mitre box to make sure your cut is nice and straight). If you plan it right, you should be able to get all these pieces with just the 4 2×4’s we mentioned. Don’t forget to factor in the saw blade’s width.
Because of this we suggest you measure, cut, measure, cut, and so on rather than make all your measurements at once.
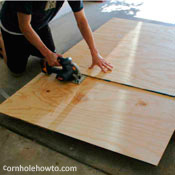 If you purchased a larger piece of plywood, measure and cut your plywood down to size. One side should already be 4 feet long so now just cut it to be 2 feet wide. If available, use a circular saw, but this could also be done very carefully with a regular old hand saw. I wanted a nice straight edge so I fastened the other piece of plywood down next to my line so I could run my saw along it as a guide.
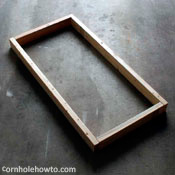
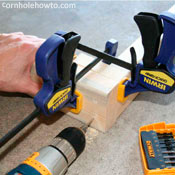 Construct your cornhole table’s wood frame with the 2×4’s and screws. We recommend 2 ½ inch wood screws. We also used a couple of clamps to hold the frame together nice and flush. We used some smaller clamps and a little ingenuity to save on cash. Countersink your screws if you don’t want them to show after you pain.
However you do it, you’ll want all of your corners and edges to be flush with the other board. Keep in mind that even an apparently straight 2×4 can have a slight bend to it. You may need to torque your boards just a bit to get the last corner together properly. Don’t worry, a little distortion will work itself out.
Tip: Drill your hole first with a drill bit slightly smaller in diameter than your screws. This makes it a little easier putting the screws in and ensures your wood doesn’t split as the screw goes in place. Also make sure to put the correct ends together. If you don’t, your frame will have the wrong dimensions!
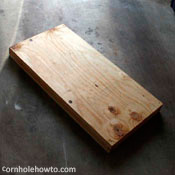 Now put your plywood surface on the frame and screw it down (pre-drill the holes again).
We used ten or twelve long screws. Your plywood should be a perfectly squared 2’ x 4’ piece of wood, but your frame might have a little distortion to it. You might need to tweak your frame just a little bit to fit the plywood’s shape. You can use your clamps again to make this part easier.
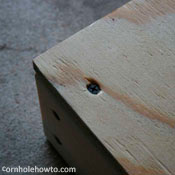 Make sure you counter-sink the screws just enough that you can cover over them with some putty later on.
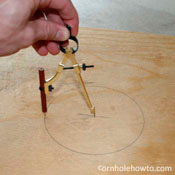 What kind of cornhole table doesn’t have a hole?! Mark the center of the hole – 9″ from the top end of the board and 12″ from either side.
Use a compass or something of the sort to draw a circle six inches in diameter.
(You can use a pencil tied to a piece of string if you need to.)
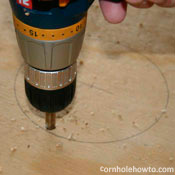 Use the largest drill bit you have to make a good pilot hole for the starting point of your saw just inside the circle.
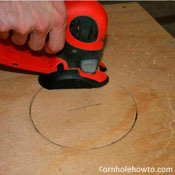 Now insert the blade of your jig saw into the pilot hole you just made. Cut out the hole as carefully as you can. If you really take your time you can get a pretty decent looking hole. It may not be perfect, but this is a straight-forward way of doing things. You can also cut a hole in your board with a hole saw or a router.
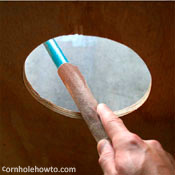 Any minor discrepancies can be cleaned up with sand paper. Wrapping it around a cylindrical object you can grip will help here.
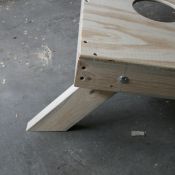 Next come the legs of your cornhole board. Most people who have gone on before you would probably agree this can be the trickiest part.
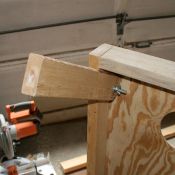
The leg has several requirements. It must raise the end of the cornhole table 12 inches off the ground. It must also be sturdy enough to withstand an onslaught of cornhole bags. Your cornhole party will be a big flop if the legs break or fold in every time a bag hits it. To make the legs incredibly stable, we’re going to make sure they extend past the frame a proper amount and make full contact with the ground. The picture to your left illustrates what we’re shooting for in the end.
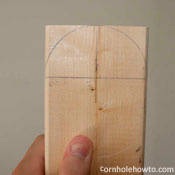 First we’re going to make a few markings on our legs. Estimate where our bolt will pass through the leg by drawing a line halfway from the side of your leg. (Remember, this midpoint will not be at the 2 inch mark since a 2×4 is not actually 2 inches by 4 inches – it will be more like 1 ¾”.) Make another line the same distance from the end of the leg and perpendicular to the first line. These two lines intersect at the point where you will want to pivot your compass. Use a compass to draw a half circle extending out to the edges of the board like shown.
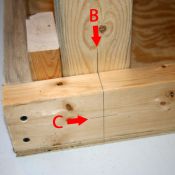 Next, turn your cornhole table over so that the plywood surface is face down. Put a piece of scrap wood in the corner as in the picture to the left (we used the end of a leftover 2×4). Take one of your leg pieces and set it in place next to the scrap wood as shown with our markings facing out.
Now, we’ll mark the hole for your bolt. Transfer your leg’s midpoint line (line B) onto the frame. Measure the midpoint of the frame’s 2×4 (line C) which again should be around 1 ¾”. Do not include the plywood in this measurement, just the 2×4 of the frame! Where these two lines intersect is where we want the bolt to go, right through the center of the frame and leg.
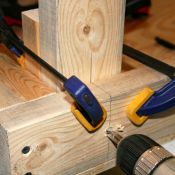 Make a little divot with an extra screw or nail at our mark to help guide the tip of the drill bit for this important step.
Drill a 3/8” hole through the side of your table and leg. You’ll notice I used clamps to hold things in place and I’ve got an extra board clamped in behind my leg. This extra board will give me a nice clean hole all the way through each piece of wood and reduces splintering. Do it this way if you’ve still got those clamps handy.
We typically go through a broad range of drill bits. We’ll start with a small bit for our pilot hole and gradually work our way up to 3/8”.
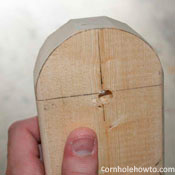 You’ll notice your leg isn’t going to do any folding away in the shape it is now. Using your mitre or hand saw, make several cuts to rough out that rounded end you sketched.
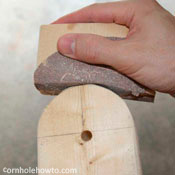 Clean up your cuts with sandpaper. You can make this as perfect as you’d like, but nobody will see this part unless they’ve collapsed from exhaustion and fallen under your board. (This actually happens quite regularly to the serious player.)
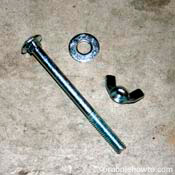
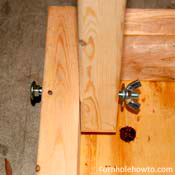
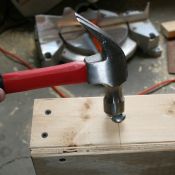 Sliding the carriage bolt through the hole in the frame (you might need to twist it through the hole) you’ll find the square shoulder of the bolt keeps things from becoming nice and flush. Take a hammer and gently tap the carriage bolt into the wood frame until it and the washer are flush with the wood surface.
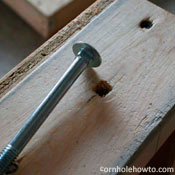 You can see I’ve created a square hole that the bolt’s shoulder will now fit. The bolt can now sit flush with the board and this also keeps your carriage bolt from turning when you tighten the nut.
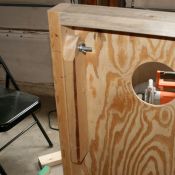 …to the folded position. The leg should move without difficulty. If not, determine what is obstructing the leg and trim some more.
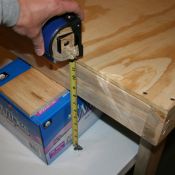 Finally, we need to get the end of your board 12 inches off the ground. Put your cornhole board up on a table. Now go in search of any extra boxes, books, pieces of wood, or whatever else you can get your hands on. Stack these items under your board until you find the perfect combination that places your board 12 inches off the table’s surface. In this picture, it just happened to be a spare piece of wood and a handy box of baby wipes.
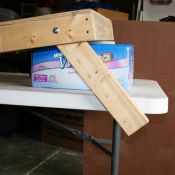 Now position your board so that the leg is fully extended into playing position and dangling off the table. (It should be longer than necessary since we haven’t precisely cut it to length yet.)
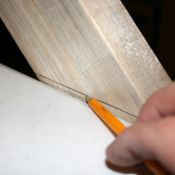 Take a pencil and make a line that runs flush with the table. Remove the leg and take it back to the mitre saw for trimming.
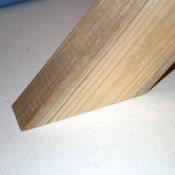 Now angle your mitre saw until it is perfectly in line with the line on your board. If you follow these directions just as they are, you should end up with a cut that is close to 45 degrees. After one quick cut you should be holding the perfect leg! Now do the same for the other leg.
Another option for making the legs would be to become an engineer. Then surely you could use your superior brain to calculate the exact measurements and laugh at us all when your cornhole table stays standing for eons and eons. For the rest of us, we’re just trying to keep this a little more simple and this technique works great!
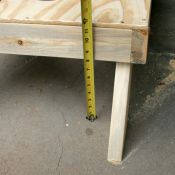 You should probably double check that you’ve cut your legs to the correct length at this point. Put your newly cut legs in place and confirm the height of your boards with a measuring tape. Remember you’ll want the raised end of your cornhole board to measure 12″ off the ground at every point along the back edge.
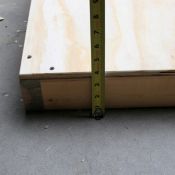 As we mentioned earlier, if you measure the front end of your board, you’ll find that it measures around 3 to 4 inches rather than 3 inches exactly as the ACO dictates. If you need a 3” front there are obviously ways to do it, but that requires extra machinery or a more complicated design. Our goal is a quality set of boards that are cheap and easy. So don’t get too upset if your boards are a half inch taller than ideal. If you get serious enough into cornhole that you need this to be exact, we’ll happily refer you to some manufacturers that can help you out. With all the millions you’ll be winning as a professional cornhole player, surely you’ll be able to afford a luxurious cornhole set. Don’t laugh, there really are some big-time players out there!
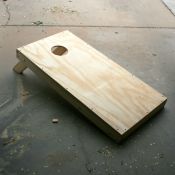 Tada! You’ve done it! Now set up your tables, take a step back and admire your handiwork. You finally have your own set that is guaranteed to withstand hours and hours of flying sacks of corn! Next we’ll talk about painting the cornhole tables and then making the bags.

